Choosing food processing cleaning equipment is not just a matter of comparing prices or picking the largest machine. The right choice depends on the product, the production line, and the soils left behind. A bakery may need to remove baked-on residue from belts, while a dairy plant faces different cleaning demands on tanks and pipes. Water pressure, drainage, access, and cleaning time all matter. Small details matter.
This guide shares seven practical tips for evaluating equipment, from matching cleaning methods to your facility’s needs to checking materials, controls, and maintenance requirements. Look closely at how a unit handles corners, joints, and hard-to-reach surfaces. Ask suppliers for clear specifications and, where possible, arrange a demonstration using representative equipment or residue. A brochure cannot show every limitation. That takes testing.
Reliable selection also involves the people who will use and maintain the equipment. Operators can spot awkward fittings or steps that slow a shift. Maintenance teams can assess whether parts are accessible and service instructions are clear. No single setup suits every plant, and even a well-chosen system needs proper training and routine checks. Some trade-offs may remain, such as balancing cleaning speed against water use. These tips are intended to support informed comparisons, not replace site-specific assessments. A careful review can help narrow the options and identify questions worth asking before purchase.
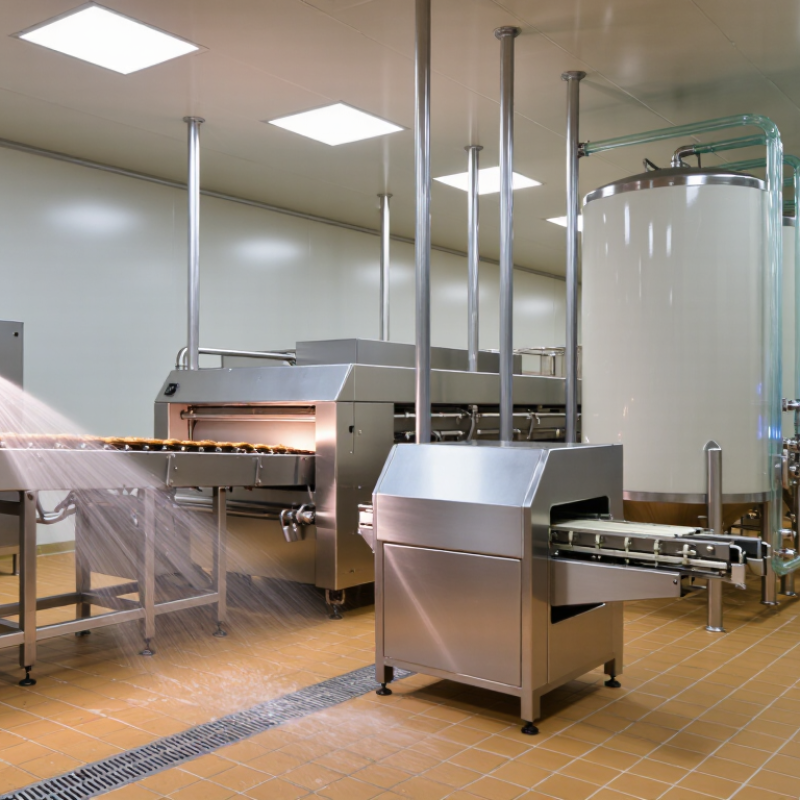
Define cleaning tasks by room, surface, and soil. A slicer with dried protein needs different tools from a floor drain carrying fat and water. Map production lines, cold rooms, drains, and high-touch controls. Note whether each area needs dry pickup, foam application, rinsing, or detail cleaning. Small details matter.
The World Health Organization’s 2015 report, Estimates of the Global Burden of Foodborne Diseases, estimated 600 million foodborne illnesses and 420,000 deaths worldwide each year. These figures show why hygiene risks deserve careful attention, though they do not measure the risk at any single facility. List hazards such as raw-to-ready food contact, residue behind guards, and moisture around equipment feet. Some gaps are easy to overlook.
Tips: Walk the facility during and after production. Photograph residue points, record cleaning frequency, and ask operators which areas are hardest to reach. Match equipment to the task: guarded brushes for narrow seams, squeegees for wet floors, and suitable low-pressure systems where splash could spread soil. Verify access, drainage, and drying time before purchase. A paper checklist helps, but it may miss what a night-shift cleaner sees.
Choosing cleaning equipment starts with the food, not the machine. Sticky dough, oily meat residue, and fine flour behave differently on stainless-steel surfaces. A spray system that clears loose crumbs may leave protein films in seams or around conveyor joints. Look closely at where soil collects. Map residue by product and shift, since a change from raw ingredients to cooked batches can alter cleaning needs.
Match the cleaning action to the residue.
Warm water can soften fats, while excessive heat may bake some protein soils onto equipment. Foam can cling to vertical panels, but it may not reach narrow hollow sections without suitable delivery and rinsing. Check nozzle reach, drainage, and access for inspection. A belt with delicate coatings needs gentler pressure than a heavy mixing bowl. That distinction is easy to miss. Test coverage on the real line.
Process conditions matter just as much. Consider operating temperature, production speed, water availability, and how long equipment can remain idle. Compact plants may need mobile units; fixed systems suit repeatable routes, but installation can limit later changes. Ask operators to test coverage during a normal shutdown, not only on an empty demonstration rig. Record missed spots and drying time. Expect trade-offs. One practical choice may still leave awkward corners, so verify results with routine visual checks and appropriate hygiene testing.
Tip 1: Match equipment materials to the cleaning method and the areas that contact food. Stainless steel is common, but its grade, surface finish, welds, and seals matter. Check chemical and temperature compatibility against equipment documentation. A rough seam can trap residue, even when the main panels look spotless. Small details matter.
Tip 2: Test accessibility before buying. Can staff reach beneath belts, around rollers, and inside guards without awkward stretching? Look for removable parts, clear inspection points, and drains that do not leave puddles. Ask operators to assess a real cleaning task, not just a showroom model. Reach every corner. I once overlooked the space behind a motor housing; it made routine checks slower than expected.
Tip 3: Confirm the unit fits the production line, not merely the floor plan. Measure openings, conveyor height, and available service space. Compare its capacity with actual line speed, then check water, power, drainage, and control connections. A unit that cleans well alone may interrupt product flow when installed. Test the proposed layout with maintenance and production staff before finalizing it.
| Tip | What to Check | Practical Verification | Why It Matters |
|---|---|---|---|
| 1. Check material compatibility | Confirm that equipment surfaces, seals, hoses, and brushes are suitable for the food, cleaning chemicals, temperature, and moisture involved. Stainless steel grades such as 304 and 316 are commonly used; 316 generally offers better resistance to chloride-related corrosion. | Request material specifications and chemical-compatibility information. Check food-contact requirements that apply in your location and for your process. | Suitable materials help reduce corrosion, contamination risks, premature wear, and unexpected replacement costs. |
| 2. Assess cleaning access | Look for accessible product-contact areas, removable parts where appropriate, and clear access around frames, guards, conveyors, and drains. | Walk through a cleaning task with operators. Check whether routine inspection and cleaning can be completed without awkward reaches or unnecessary disassembly. | Good access makes cleaning and inspection more practical and can help reduce missed areas and downtime. |
| 3. Confirm production-line fit | Compare the equipment’s footprint, working height, conveyor width, direction of travel, and connection points with the existing line layout. | Measure the available space and verify clearances, infeed and outfeed alignment, drainage, and access for maintenance before ordering. | A physical fit check helps prevent installation conflicts and disruption to adjacent equipment or product flow. |
| 4. Match capacity to production | Compare the cleaning unit’s rated throughput and operating speed with the line’s normal and peak production rates. | Review capacity data under conditions similar to your product, soil load, and operating schedule. Confirm how the unit performs during planned changeovers and cleaning cycles. | A capacity mismatch can create a bottleneck or leave insufficient time for the required cleaning process. |
| 5. Verify the cleaning method and utilities | Check whether the equipment uses dry cleaning, manual washdown, foam, spray, or another method, and identify its requirements for water, drainage, compressed air, power, or detergent. | Compare the stated utility requirements with site capacity. Confirm chemical use, wastewater handling, and any temperature or pressure limits. | Matching the method and utilities to the facility helps avoid installation surprises and supports consistent operation. |
| 6. Look for hygienic, drainable design | Inspect joints, welds, fasteners, corners, and surfaces for areas where food residue or water could collect. Consider surface-finish requirements appropriate to the product and cleaning process. | Ask for design drawings and inspect a demonstration unit or sample. Check that surfaces are accessible and that water can drain rather than pooling. | Reducing difficult-to-clean areas and retained moisture supports effective sanitation and easier inspection. |
| 7. Review safety, maintenance, and verification | Check guarding, emergency stops, lockout provisions, operator access, spare-part availability, and the supplier’s cleaning and maintenance instructions. | Have operators and maintenance staff review the equipment. Define how cleaning effectiveness will be verified using site procedures, such as visual inspection or appropriate monitoring tests. | Safe operation, maintainability, and documented verification help keep the equipment reliable and cleaning procedures consistent. |
Cleaning performance should be tested against the residues your line actually produces, not just a supplier’s demonstration. Run the equipment on representative product soils, then inspect seams, guards, drain points, and hard-to-reach joints. Small details matter. Use a consistent method, such as timed visual checks or residue testing, and record water temperature, pressure, and cycle duration. A clean-looking surface can still hide buildup. I have seen teams rely too heavily on appearance; that shortcut deserves a second thought.
Operator safety is part of cleaning performance. Check whether controls can be reached without leaning across wet floors, whether hoses create trip hazards, and whether isolation procedures are practical during maintenance. Ask operators to run a trial and describe awkward steps. Their feedback may reveal a problem that a neat specification sheet misses. Then inspect again. Confirm that materials tolerate the detergents and heat used, and that drainage prevents standing water. Review equipment documentation, cleaning records, and applicable food-safety requirements before purchase. Compliance is easier to maintain when the machine supports clear, repeatable procedures, though paperwork alone cannot prove the cleaning works.
Tip 1: Compare what automation actually does. A conveyor wash system may reduce manual scrubbing, but it still needs loading, inspection, and careful setup. Ask suppliers to demonstrate cleaning on your equipment, not just an empty machine. Watch for missed corners and water pooling. Small details matter.
Tip 2: Check maintenance before comparing purchase prices. Can staff reach filters, spray nozzles, and pumps without awkward tools? Request a schedule for routine checks and replacement parts. A machine that is hard to service may sit idle during a busy shift. Downtime adds up.
Tip 3: Estimate total ownership costs over several years. Include installation, water, heating, detergents, staff training, spare parts, and expected downtime. Compare these figures with labor savings, using realistic shift patterns rather than ideal conditions. Estimates are imperfect. They still help. Ask how cleaning performance is verified after installation, and keep room in the budget for adjustments. A cheaper unit may use more hot water or require frequent nozzle changes; a highly automated one may need specialized service. The right choice depends on your facility’s workload, staff skills, and cleaning routine.
Compare automation, maintenance needs, and total cost of ownership before selecting a cleaning approach.
Illustrative planning ratings on a 1–5 scale, not measured industry averages. Higher automation indicates more automation; higher maintenance and TCO ratings indicate greater burden or cost. Validate ratings against your facility’s soil load, water and energy use, labor, sanitation requirements, and equipment quotes.
JK Machinery a.s.
Psohlavců 322/4, Praha 4,
Czechia
T: +420 777 610 380
E: sale@roll-formingmachinery.com