Ask us


Titanium Welding demands more than a hot arc and a clean-looking bead. Its strength, low density, and corrosion resistance attract buyers across aerospace, medical, chemical, and performance equipment markets. Yet titanium reacts quickly with oxygen, nitrogen, moisture, and surface contamination during heating. A careless setup can create a brittle weld that looks acceptable at first.
This guide explains how titanium welding works, what equipment supports reliable results, and which buyer questions deserve careful attention. It covers material grades, joint preparation, shielding gas, torch design, filler selection, and inspection practices. Look for welders with documented experience, qualified procedures, and familiarity with applicable industry standards. Ask how they protect the weld pool and cooling zone. A trailing shield often matters as much as the torch itself. The weld should usually appear bright silver or lightly metallic. Gray, blue, or chalky discoloration may indicate contamination.
Details matter. Clean gloves prevent fingerprints from reaching the joint. A stainless steel brush should remain dedicated to titanium. Even a small draft can disturb argon coverage. It happens.
Buyers should also examine traceability, test records, equipment condition, and post-weld inspection methods. A perfect-looking bead can still hide porosity or inadequate penetration. Experienced fabricators know this, but no supplier is beyond review. Material certificates, procedure records, and clear acceptance criteria make comparisons more reliable. The right decision balances price, technical evidence, delivery needs, and long-term service performance.
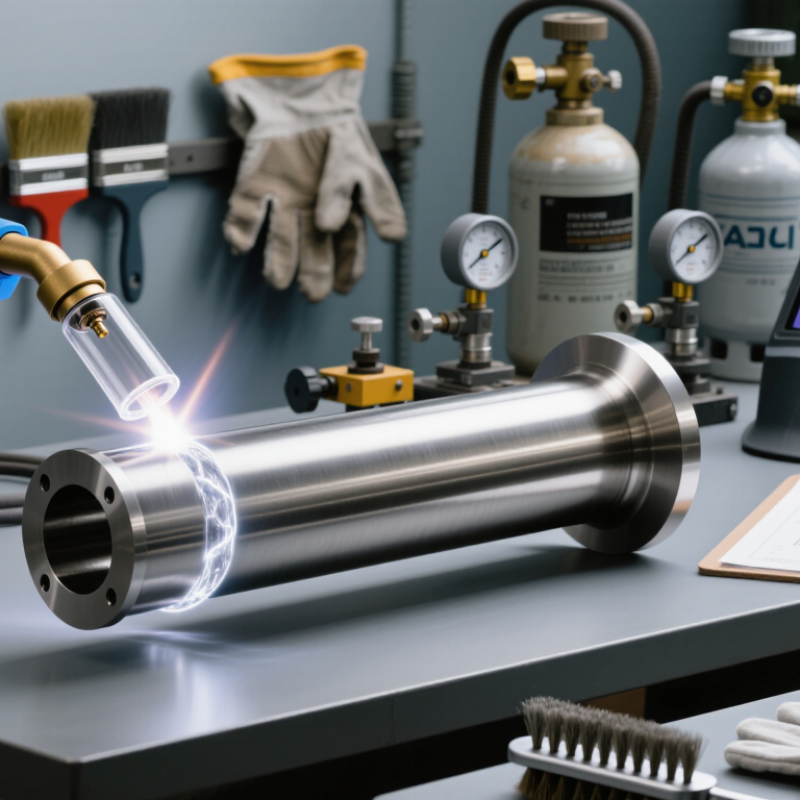
Titanium welding begins with material selection, not the welding torch. Grade 2 suits many corrosion-resistant fabrications and forms readily. Grade 5 offers higher strength but demands tighter heat control. Some alloys respond poorly to welding because their chemistry changes during heating. Confirm the exact grade, thickness, service temperature, and corrosive environment before preparing the joint.
Cleanliness is critical. Remove oil, fingerprints, paint, and oxide with approved solvents and a dedicated stainless-steel brush. Never use tools that touched carbon steel. Use gas tungsten arc welding with high-purity argon and complete shielding. A trailing shield protects the hot metal behind the arc. Shielding should continue until the weld cools visibly. Cleanliness matters. That color is data.
A bright silver weld usually indicates effective protection. Straw, blue, or gray discoloration suggests oxygen exposure and deserves investigation. Keep the arc short, control travel speed, and avoid excessive current. Fit-up must be consistent, because titanium does not forgive wide gaps easily. I have seen acceptable-looking welds fail later after careless surface preparation. That mistake is easy to underestimate. Testing should match the application, including visual inspection, bend testing, or radiography when required. Final selection also depends on joint design, available shielding access, and the welder’s qualification.
| Titanium Grade | Typical Composition or Type | Typical Tensile Strength | Weldability | Common Applications | Typical Filler Selection |
|---|---|---|---|---|---|
| Grade 1 | Commercially pure titanium with the lowest strength and highest ductility | Approximately 240 MPa minimum | Excellent | Chemical processing, heat exchangers, low-strength corrosion-resistant components | Matching commercially pure titanium filler, commonly Grade 1 or Grade 2 depending on joint requirements |
| Grade 2 | Commercially pure titanium with a balance of strength, formability, and corrosion resistance | Approximately 345 MPa minimum | Excellent | Piping, tanks, marine equipment, chemical and desalination systems | Matching Grade 2 filler is commonly selected |
| Grade 5 | Ti-6Al-4V alpha-beta alloy with high strength and moderate ductility | Approximately 895 MPa minimum | Good, but more sensitive to contamination and heat input than commercially pure grades | Aerospace structures, pressure components, medical devices, high-strength fabrications | Matching Ti-6Al-4V filler, commonly designated Grade 5 filler |
| Grade 9 | Ti-3Al-2.5V alloy with lower strength than Grade 5 and improved formability | Approximately ಂಗ620 MPa minimum | Good | Tubing, hydraulic lines, airframe components, lightweight pressure systems | Matching Ti-3Al-2.5V filler, commonly Grade 9 filler |
| Grade 23 | Ti-6Al-4V ELI with reduced interstitial content and improved toughness | Approximately gau860 MPa minimum | Good when strict shielding and cleanliness controls are maintained | Cryogenic systems, surgical implants, aerospace and fracture-critical components | Matching Ti-6Al-4V ELI filler, commonly Grade 23 filler |
| Welding Factor | Recommended Practice | Buyer Selection Consideration |
|---|---|---|
| Preferred process | Gas Tungsten Arc Welding is widely used for high-quality titanium joints. Plasma arc welding and laser welding may be used for suitable production designs. | Choose a process that provides stable arc control, low contamination risk, and repeatable heat input. |
| Current type | Direct current electrode negative is the standard choice for most titanium GTAW work. | A high-frequency start and precise current control help prevent tungsten inclusions and arc instability. |
| Shielding gas | High-purity argon is commonly used. Helium or argon-helium mixtures can increase heat input for some applications. | Specify high-purity welding gas and clean, dedicated gas lines. Avoid gas contamination from moisture, oil, or dirty fittings. |
| Trailing shield | Use a trailing shield to protect the hot weld bead and adjacent heat-affected zone until the metal cools sufficiently. | The torch and trailing shield should provide complete coverage without disturbing the shielding-gas flow. |
| Back purging | Use internal argon purge for pipe, tube, tanks, and any joint where the root side is exposed to air. | Include purge dams, gas outlets, and purge monitoring when internal oxidation could affect service life. |
| Preheating | Preheating is normally unnecessary. The joint must be completely dry and free from condensation before welding. | If preheating is used for moisture control, maintain a clean, controlled temperature and prevent surface contamination. |
| Interpass temperature | Keep the workpiece cool between passes; many procedures specify an interpass limit near 65°C or lower. | For thick sections or multiple passes, verify the procedure with temperature measurement and controlled cooling intervals. |
| Heat input | Use the lowest practical heat input that achieves complete fusion. Excessive heat can enlarge the heat-affected zone and reduce ductility. | Look for equipment with pulsed-current capability, accurate travel control, and documented welding procedures. |
| Joint preparation | Use clean square-groove, V-groove, or other qualified joint designs appropriate for the material thickness. | Machining is preferred for critical joints. Remove burrs and avoid tools that have previously been used on steel or copper. |
| Surface cleaning | Degrease with a suitable solvent and use a dedicated stainless-steel brush immediately before welding. | Control fingerprints, dust, oil, paint, marker residue, and embedded iron particles throughout fabrication. |
| Weld appearance | Bright silver or light straw coloration generally indicates good shielding. Blue, gray, purple, or white oxidation signals possible contamination or inadequate protection. | Define acceptable weld-color limits in the purchasing specification and require visual inspection after cleaning. |
| Post-weld cleaning | Remove discoloration and residue using approved mechanical or chemical cleaning methods when required by the service environment. | For medical, aerospace, and chemical-service parts, specify the cleaning method, surface finish, and inspection standard. |
| Selection Dimension | What to Evaluate | Practical Recommendation |
|---|---|---|
| Strength requirement | Required tensile strength, yield strength, fatigue resistance, and design safety factor | Use commercially pure grades for corrosion-focused designs and Grade 5 or Grade 23 when higher strength is required. |
| Corrosion environment | Chlorides, acids, seawater, oxidizing chemicals, temperature, and crevice conditions | Confirm compatibility with the complete service environment, including weld metal and heat-affected zones. |
| Operating temperature | Minimum and maximum service temperatures, thermal cycling, and cryogenic exposure | Consider Grade 23 for applications requiring improved toughness at low temperatures. |
| Formability | Bending radius, tube forming, machining requirements, and post-weld dimensional control | Grade 1 and Grade 2 provide excellent formability; Grade 9 offers a useful balance of formability and strength. |
| Thickness and joint design | Material thickness, access to both sides, root configuration, and number of weld passes | Obtain a qualified welding procedure for the exact thickness range and joint configuration. |
| Quality documentation | Material certification, chemical analysis, mechanical properties, heat treatment, and traceability | Request certificates showing grade, specification, heat or lot identification, thickness, and inspection results. |
| Inspection requirements | Visual inspection, dye penetrant testing, radiography, ultrasonic testing, or destructive testing | Match inspection methods to joint criticality and applicable engineering or regulatory requirements. |
Note: Property values and welding ranges are representative guidance values. Final material and welding parameters should be confirmed against the applicable material specification, qualified welding procedure, service conditions, and inspection requirements.

JK Machinery a.s.
Psohlavců 322/4, Praha 4,
Czechia
T: +420 777 610 380
E: sale@roll-formingmachinery.com


