A Manometer Connector is the small but essential link between a pressure source and a manometer. It may connect a hose, tube, or process port to the instrument, creating a path for pressure to reach the measuring element. The connector itself does not measure pressure. Its fit and condition can still affect the reading. A loose thread, worn seal, or mismatched fitting may allow a leak. The result can be a drifting reading, a slow response, or no measurement at all.
David W. Spitzer is a process-control specialist whose work concerns practical measurement and instrumentation. The following sentence is an editorial summary, not a verified direct quotation from him: “A pressure reading is only as trustworthy as the connection carrying pressure to the instrument.” That distinction matters. Connector designs vary by thread, size, material, and pressure range; similar-looking fittings are not automatically interchangeable. Check the instrument manual and the connector specifications before assembly. Keep the sealing surfaces clean. Tighten the fitting as directed, rather than forcing it. Small details count.
This guide explains how a Manometer Connector works, what happens as pressure passes through it, and which details affect a dependable measurement. It also considers common connector types and practical inspection points. One caution deserves emphasis: a connector can look secure while still leaking. A careful check helps catch that. Reliable readings begin with a sound connection, but technique and instrument condition matter too.
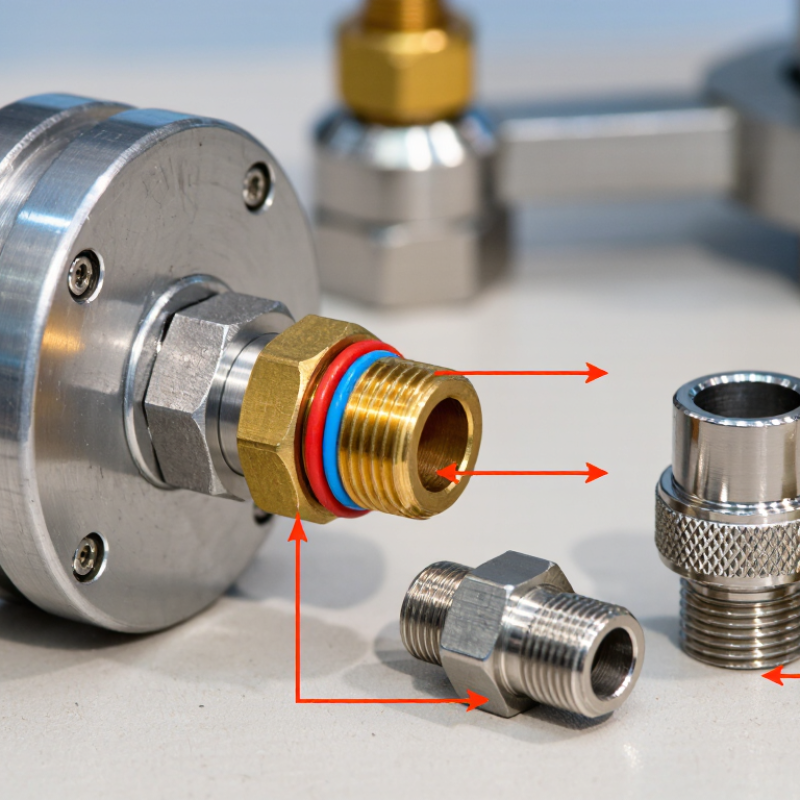
A manometer connector is the fitting that joins a pressure-measuring instrument to a tube, hose, or pressure tap. It creates a physical path for pressure to reach the instrument’s sensing element. Depending on the setup, the connector may use a threaded end, a hose barb, or a compression fitting. Its shape and size must match the instrument port and the connected line.
Fit matters. A connector that screws into place may still have the wrong thread, sealing method, or pressure rating. Some designs rely on a gasket or sealing washer; others seal at the threads or through a compressed ferrule. The right choice depends on the manometer, the measured medium, and the operating conditions. Check the instrument documentation and connector specifications rather than assuming similar-looking parts are interchangeable.
A poor seal can let air escape or enter, causing unstable or misleading readings. Leaks distort readings. Before use, inspect the fitting for damage, confirm that the connection is secure, and follow the instrument’s recommended leak-check procedure. Material compatibility also matters, especially when the measured fluid could corrode or weaken the connector. A small fitting deserves careful attention. It is easy to overlook.
A manometer connector joins the pressure source to the instrument’s inlet. It does not measure pressure; it provides a sealed path for air or liquid. Most connectors have a body, an inlet, and a sealing surface such as an O-ring or washer. Some also include a locking collar or nut to hold tubing firmly. A connector can look right and still leak.
Common types include threaded fittings, hose barbs, compression connectors, and quick-connect couplings. Threaded fittings suit ports with matching thread forms, while hose barbs grip flexible tubing. Compression styles use a ferrule that tightens around the tube. Quick-connects make repeated setup easier, but their internal seals need inspection. The correct choice depends on the manometer port, tubing size, pressure range, and fluid. Thread compatibility matters: similar-looking threads may not seal together.
Tips: Check the fitting and seal before each test. Tighten only as specified; overtightening can damage threads or deform a seal. Apply pressure gradually, then watch for unstable readings or leaks. If the connection still feels uncertain, verify its specifications before use.
A manometer connector forms the small, sealed passage between a pressure source and the instrument’s sensing element. Its sealing face may use a gasket, an O-ring, or a tapered metal seat. When tightened, the mating surfaces compress the seal and close tiny escape paths. Threads usually provide clamping force; they are not necessarily the sealing surface. That detail is easy to miss.
For a reliable seal, the connector must match the port, pressure range, and fluid. A mismatched thread can feel snug while leaving a narrow leak path. Dirt, scratches, or a twisted O-ring can cause the same problem. Under pressure, even a small leak may make readings drift or respond slowly. ASME B40.100 defines pressure-gauge accuracy grades, including 0.5% and 1% of span; a leaking connection can undermine readings regardless of the gauge’s grade. After assembly, technicians commonly check for leakage and compare the instrument against a suitable pressure reference. NIST guidance on measurement uncertainty also emphasizes accounting for influences across the measurement process, not just the instrument itself. A bubble at the joint is a warning. So is a reading that will not settle.
A sealed connector provides a continuous path for pressure to reach the manometer. This chart shows the ideal pressure difference produced by a water column at 20°C, calculated using ΔP = ρgh. It illustrates the fluid relationship, not measured connector performance.
A manometer connector forms the pressure pathway between a pipe, vessel, or test point and the measuring instrument. When attached, it lets the pressure at the source act on the manometer’s sensing element. In a liquid-column model, that pressure moves the liquid until the columns reach balance. The height difference then indicates the pressure difference. Simple, but sensitive.
A tight, well-seated connection matters. If air leaks around the fitting, the manometer may show a reading that drifts or sits below the true value. The connector’s thread or sealing face must match the port, and the tubing should not be kinked or pulled sideways. Hand-tightening may be enough for some fittings; others need the specified tool and torque. More force is not automatically better.
Before reading, check that the line is clear and the instrument is positioned as intended. A droplet or trapped pocket in the tubing can interfere with pressure transfer, especially at low pressures. With differential measurements, each port must connect to the correct side. This is easy to mix up. Even careful setups can have small errors, so comparing the zero reading before and after a test is a useful check.
What Is a Manometer Connector and How Does It Work?
Factors That Affect Connection Accuracy and Safety
A manometer connector joins the instrument to a pressure source through a fitting, hose, or adapter. It guides pressure to the sensor or liquid column, so the reading depends on the whole connection—not just the gauge. A loose fitting can leak. A mismatched thread may feel tight but still seal poorly. Small details matter.
Accuracy can shift when tubing is kinked, excessively long, or exposed to heat and vibration. Dust or liquid inside the line may also affect the pressure path. Match the connector to the instrument and port, and check the pressure rating before use. Keep connections aligned and snug, without forcing threads. Before measuring, inspect seals and look for leaks; even a faint hiss deserves attention. Safety comes first. Isolate and release pressure before changing a connection. In practice, setups are not always perfect, so record unusual conditions and repeat readings when results seem inconsistent.
Tips: Use clean, undamaged tubing and the correct seal. Support the hose to prevent strain on the fitting. Never exceed the instrument’s rated pressure. A quick visual check helps, but it cannot replace proper calibration.
JK Machinery a.s.
Psohlavců 322/4, Praha 4,
Czechia
T: +420 777 610 380
E: sale@roll-formingmachinery.com